Entering time and expenses
This guide covers entering time (Timesheets) and expenses (Expenses) and submitting them for approval. Time is submitted one day at a time; expenses are submitted as expense reports.
Click Guide at the top right of any page to see how that page works.
1. Log in
You can use BookSync once your admin has added you. There is no invitation email, so log in one of these ways:
- First time: on the booksync.ai login page, click First time user / Forgot password? and enter your work email. Set your password from the email you receive.
- Your company uses Microsoft 365: click Continue with Microsoft and sign in with your work Microsoft account.
On a phone, BookSync opens its mobile view (section 7).
2. Enter time
Open Timesheets in the left menu to see this week (Monday to Sunday). The top shows the week's total and how many entries are draft, rejected, submitted and approved. Each day has its own box below. Use ← Prev, This Week and Next → to change weeks.
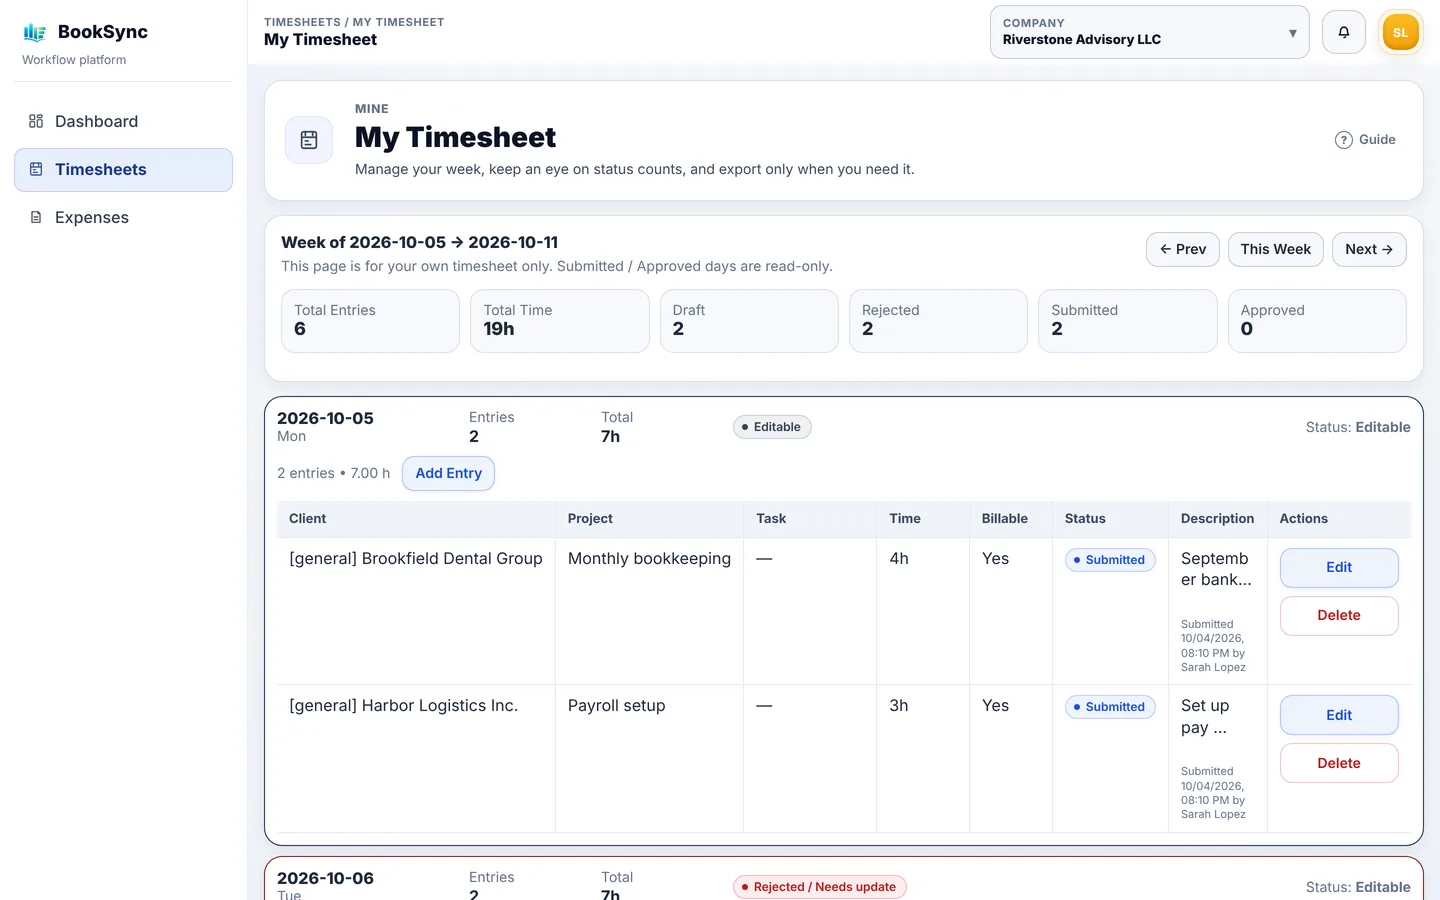
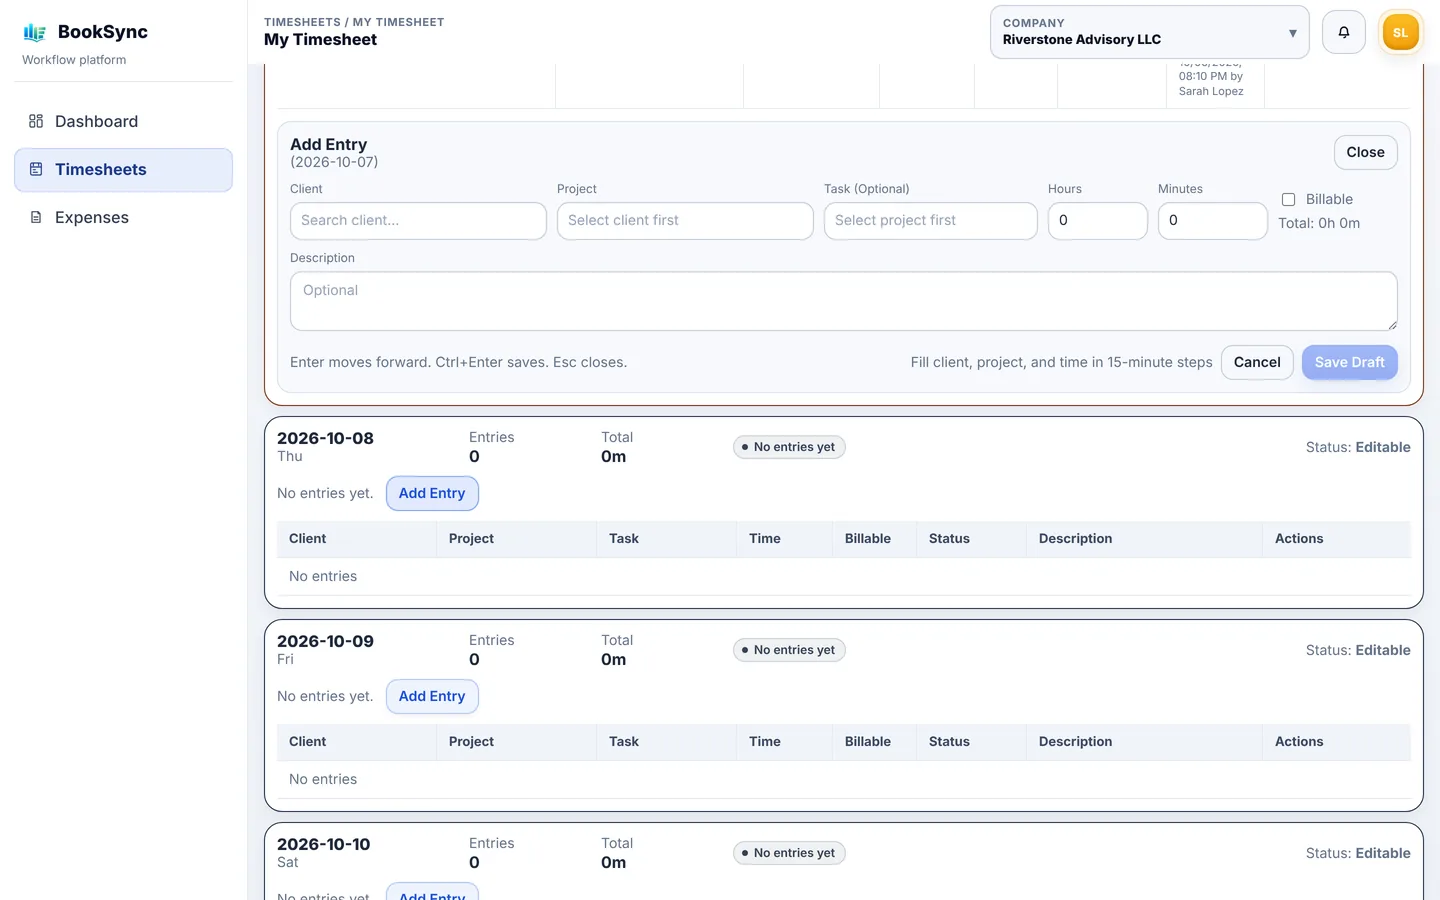
- Click Add Entry on the day.
- Fill in:
- Client: start typing to see matches
- Project: a project of that client
- Task (Optional)
- Hours and Minutes: minutes are 0, 15, 30 or 45
- Billable: check it if the work is billed to the client
- Description: what you did (optional)
- Click Save Draft. The entry is now a draft and has not been submitted yet.
Add as many entries per day as you need. Use Edit to change a draft and Delete to remove it.
3. Submit time
Time is submitted one day at a time. There is no button to submit a whole week.
- When the day is complete, click Submit Day on the right of that day. It only appears on days with drafts.
- Confirm with OK. All drafts for that day become Submitted.
Depending on your company's settings, time may be approved automatically when you submit.
| Status | Meaning |
|---|---|
| Draft | Not submitted yet |
| Submitted | Waiting for approval |
| Approved | Approved. The day can't be changed and no entries can be added |
| Rejected | Sent back. Fix it and submit again (section 6) |
Until it is approved, you can still Edit a submitted entry. Editing turns it back into a draft, so click Submit Day again.
4. Enter expenses
Expenses go into expense reports. Make one per trip, week or month, whatever your company prefers.
Create an expense report
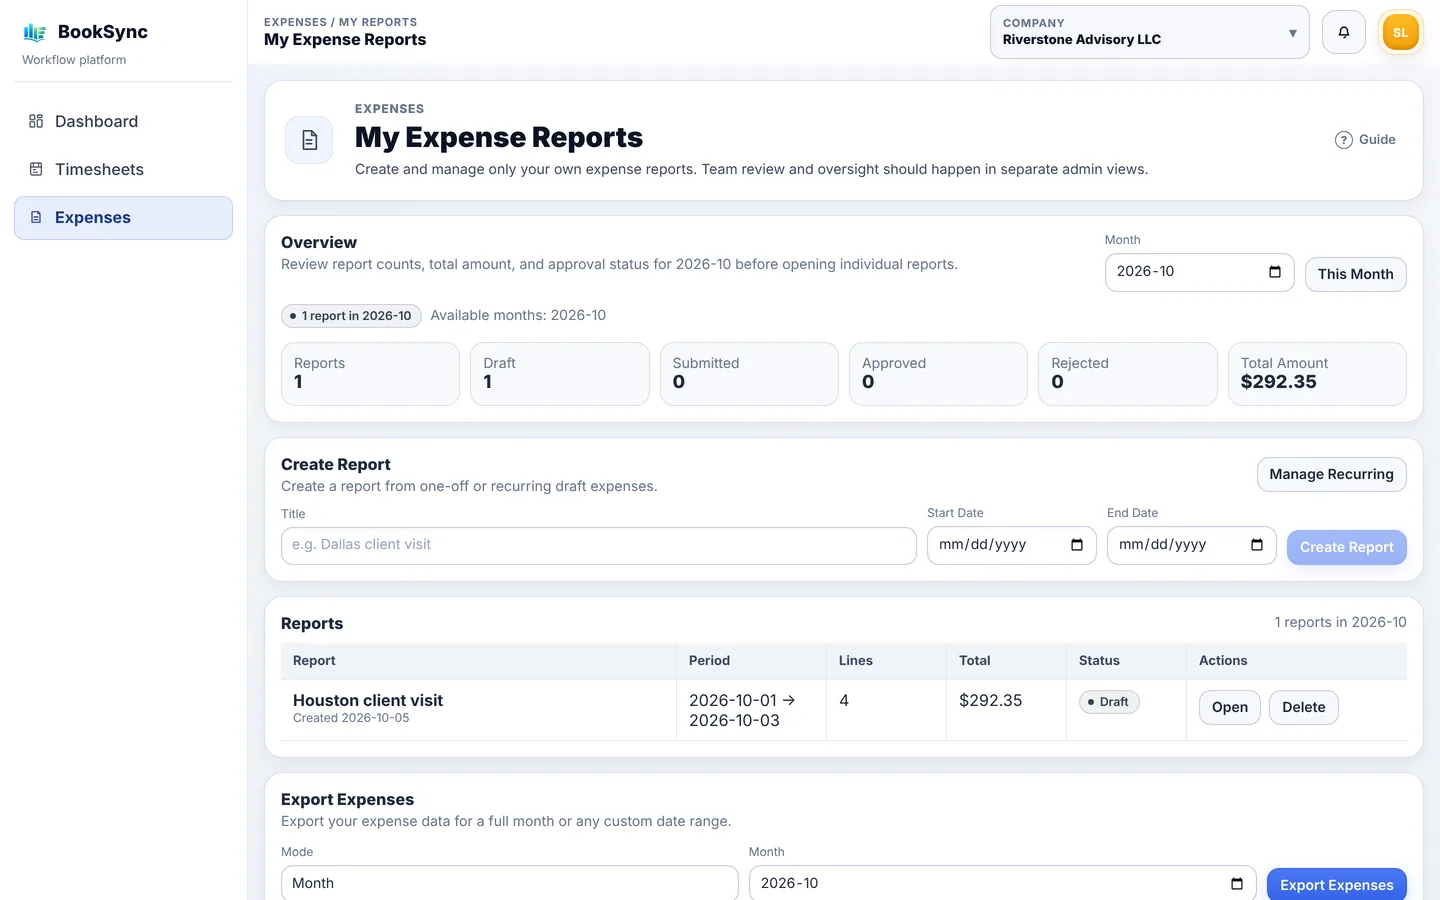
- Open Expenses in the left menu.
- Under Create Report, enter a Title (for example, Houston client visit), Start Date and End Date, then click Create Report.
- The report appears in the list below. Click Open.
Add an expense
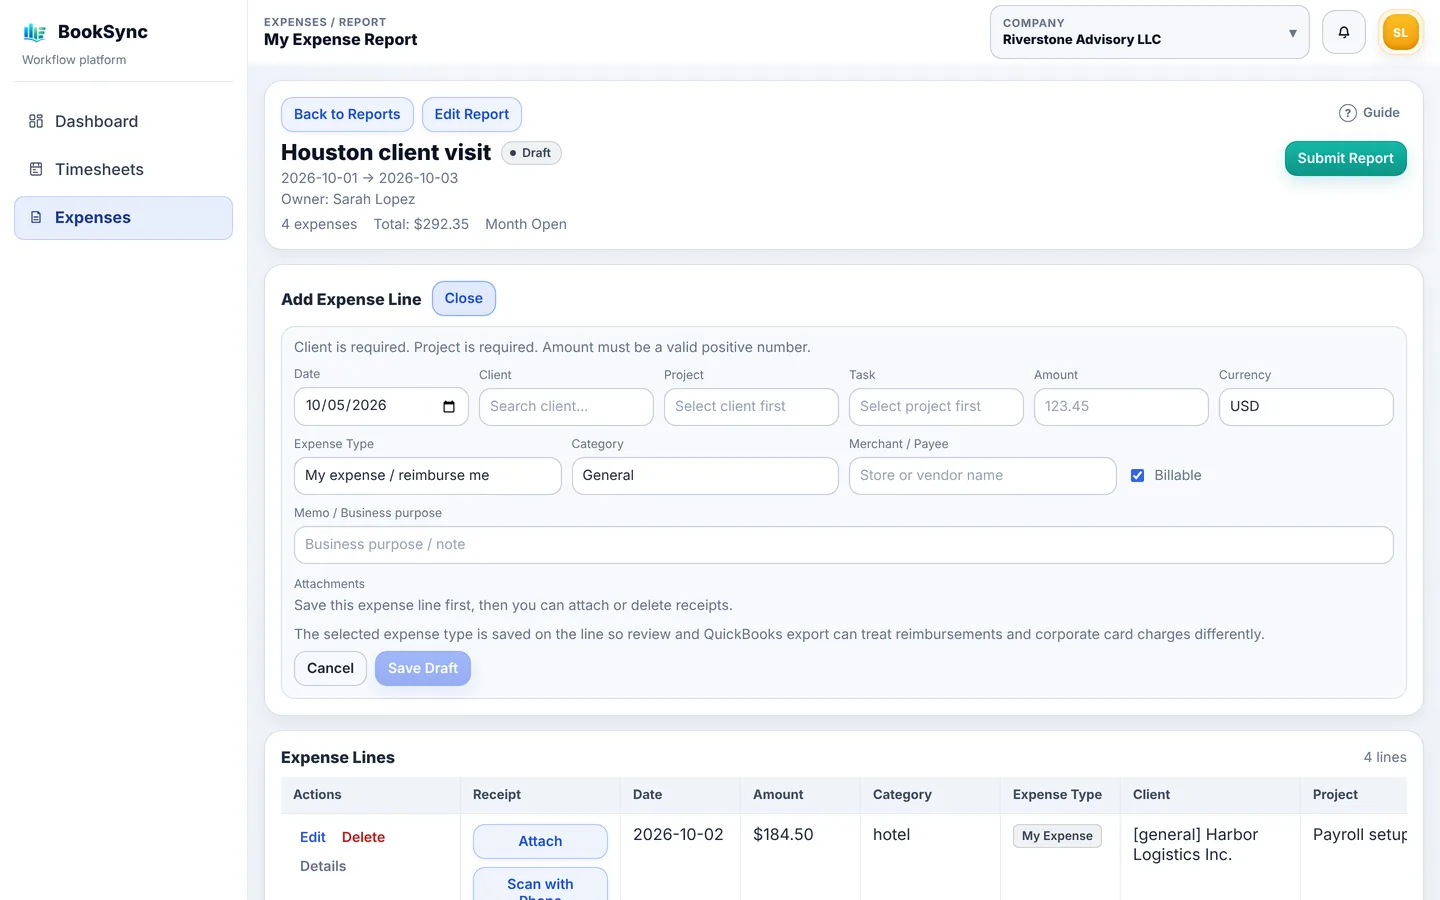
- In the report, click Add Line.
- Fill in:
- Date, Amount and Currency (usually USD)
- Client and Project: what the expense was for (required)
- Expense Type: "My expense / reimburse me" if you paid, "Corporate card used" if you used a company card
- Category: hotel, meals, parking and so on. Hotel and airfare add fields such as hotel name or route
- Merchant / Payee: picking a merchant you used before fills in the category you used last time
- Billable: check it if the expense is billed to the client
- Memo / Business purpose: why you spent it
- Click Save Draft.
Add a receipt
Add the receipt after you save the expense, from the Receipt column.
- Attach: choose an image or PDF on your computer
- Scan with Phone: scan the QR code with your phone camera and take a photo of the receipt. No need to log in on the phone
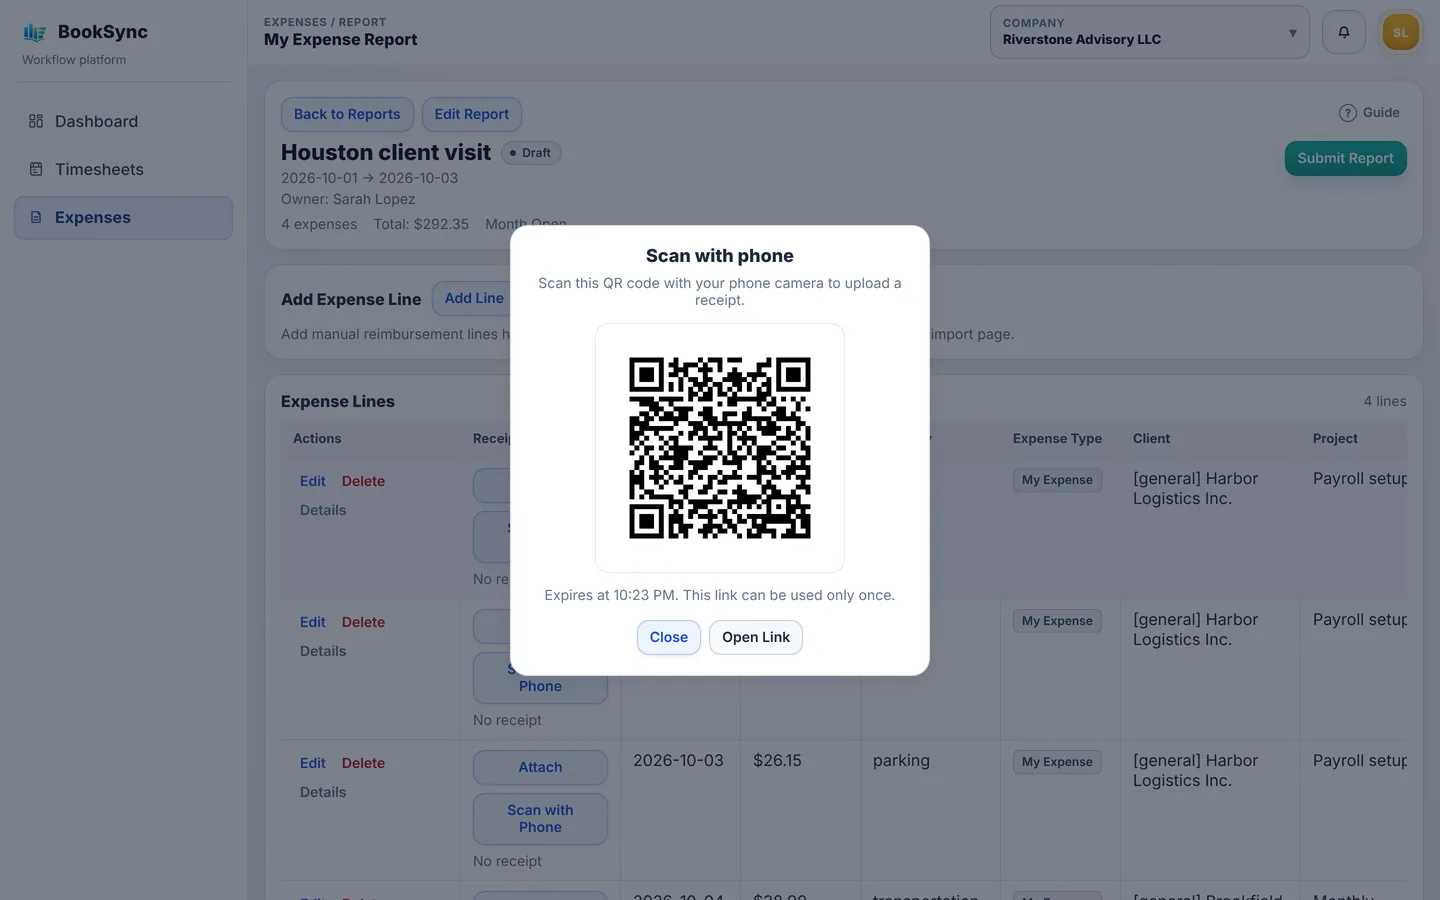
Each QR code works once and expires after a while. If it expires, click Scan with Phone again. Click View to check an attached receipt.
5. Submit an expense report
When the expenses and receipts are in, click Submit Report at the top right of the report. Every expense in it goes for approval together.
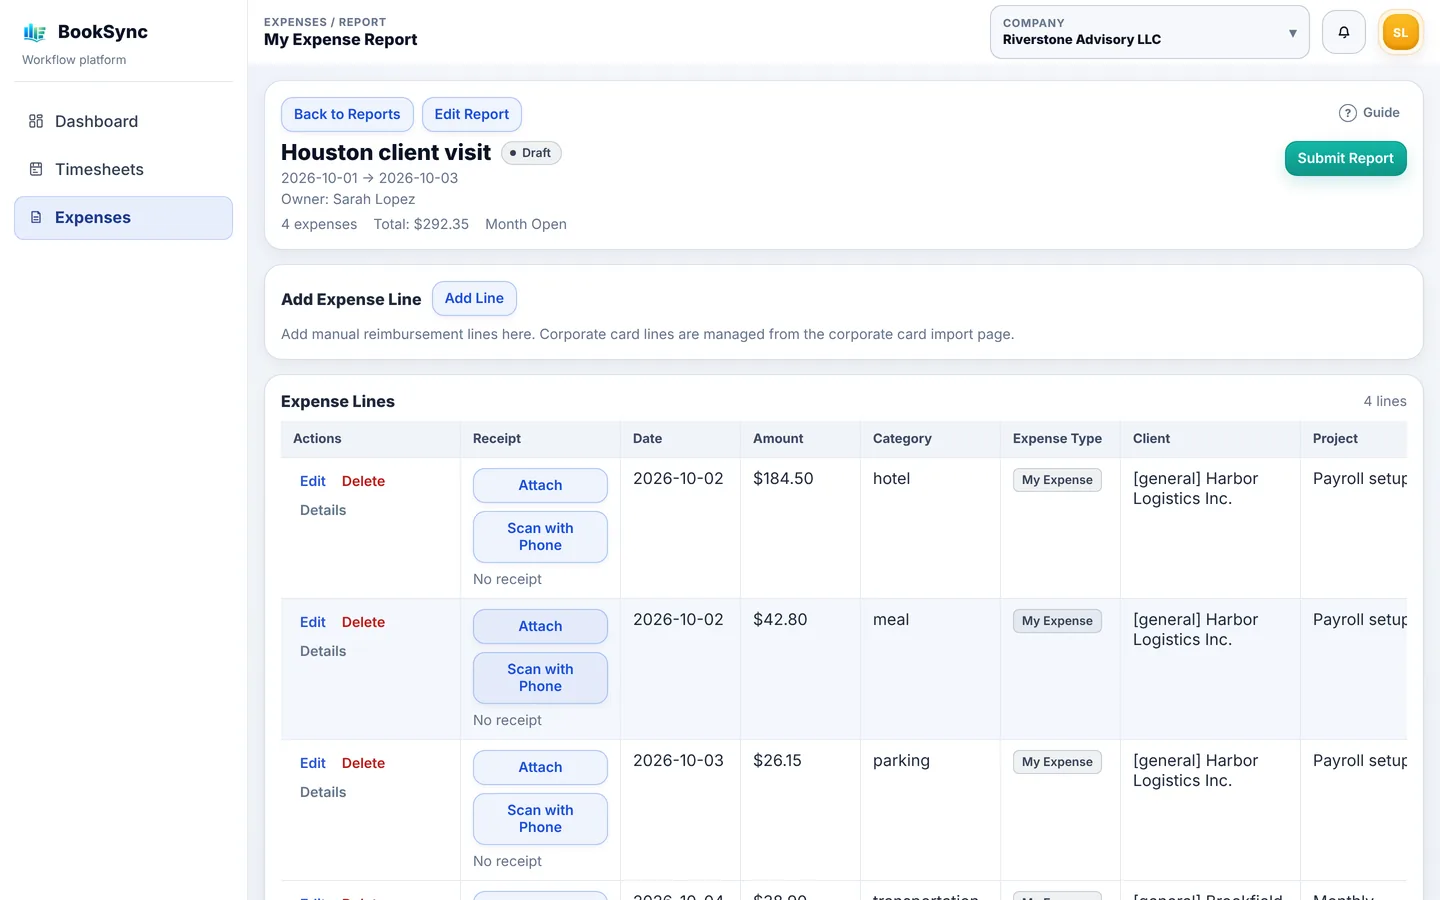
- A report with no expenses can't be submitted.
- Once your company closes a month (Month Closed), reports in that month can't be submitted or changed.
- Until they are approved, you can still change expenses. A changed expense goes back to draft, so click Submit Report again.
- Draft and rejected reports can be removed with Delete in the list.
6. When something is sent back
Check the reason, fix it and submit again.
Time
- The day shows Rejected / Needs update.
- Click Edit on the rejected entry. The Rejection reason appears in a red box.
- Fix it, click Save, then click Submit Day for that day.
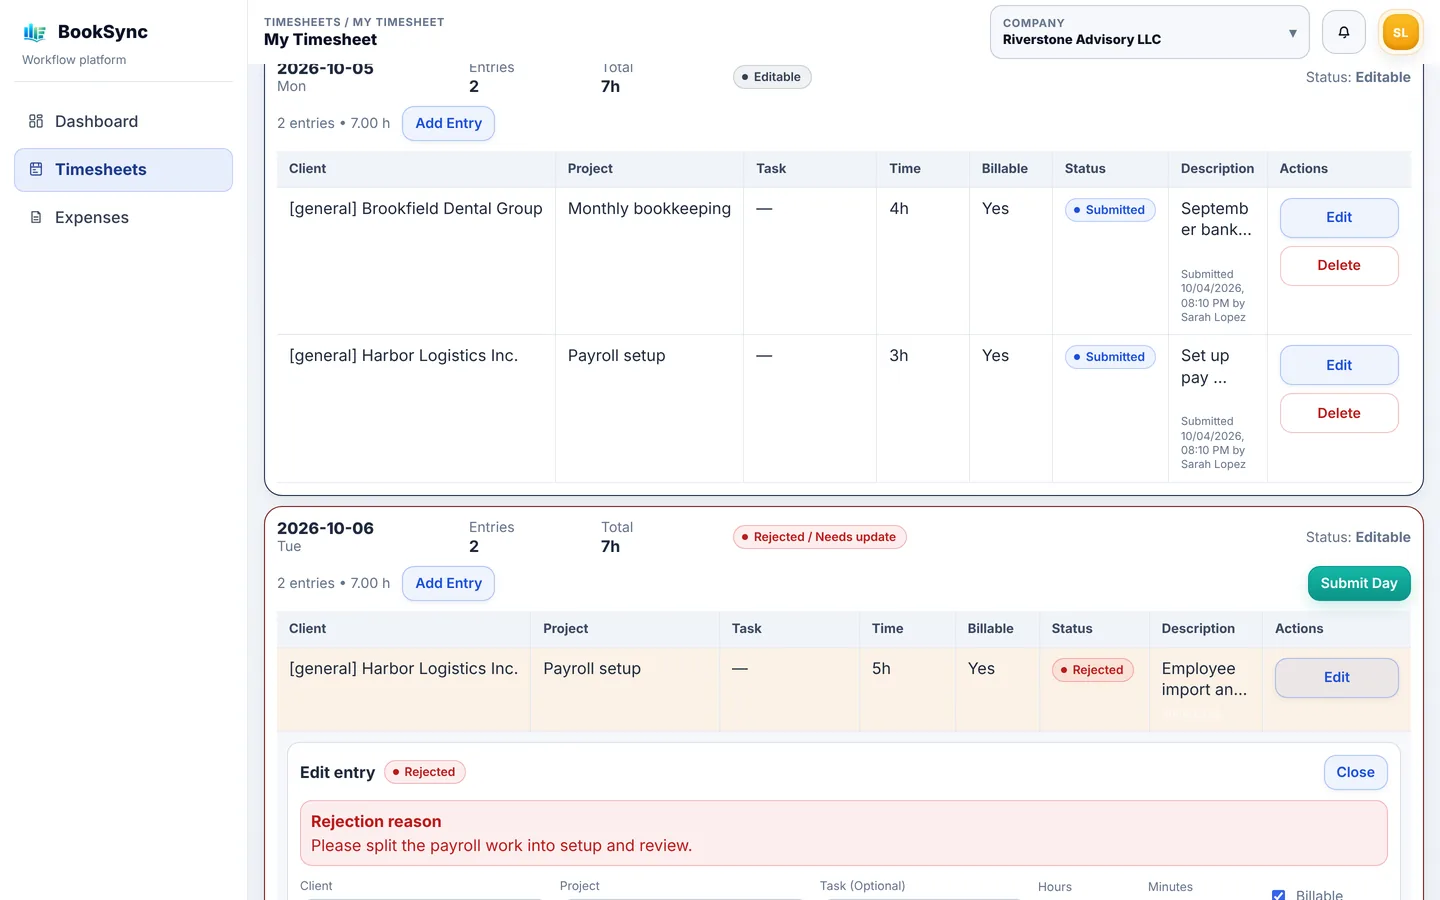
Rejected time can't be deleted. If you don't need it, talk to your approver.
Expenses
- The Rejection reason appears at the top of the report. If only some expenses were rejected, click Details on that line to see why.
- Click Edit to fix it, then click Submit Report again.
7. Use BookSync on your phone
Log in at booksync.ai in your phone's browser to get the mobile view. Switch screens with Time, Expense and Profile at the bottom (approvers also see Approve).
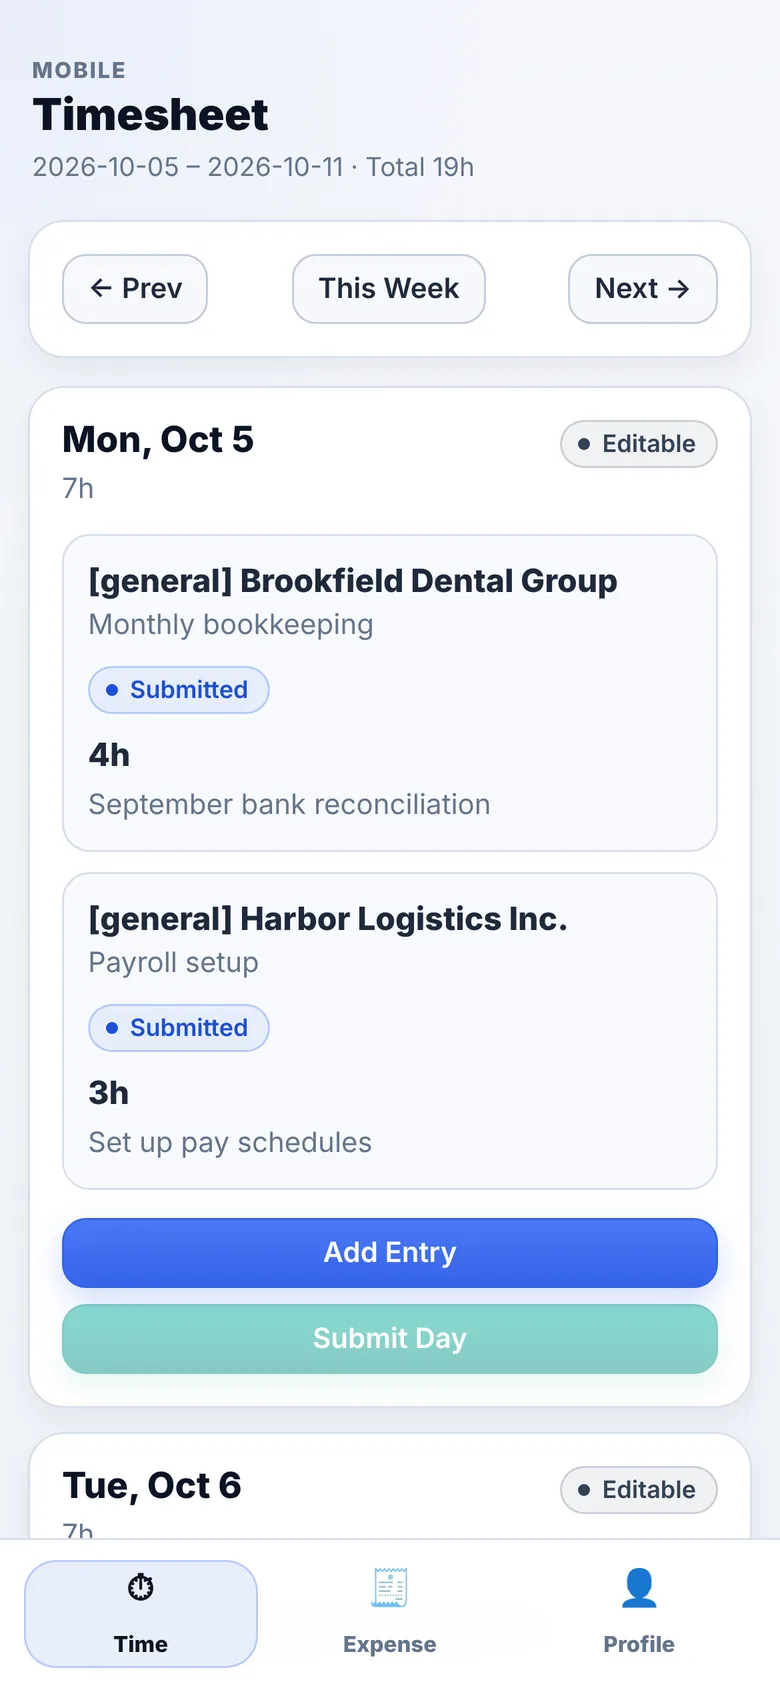
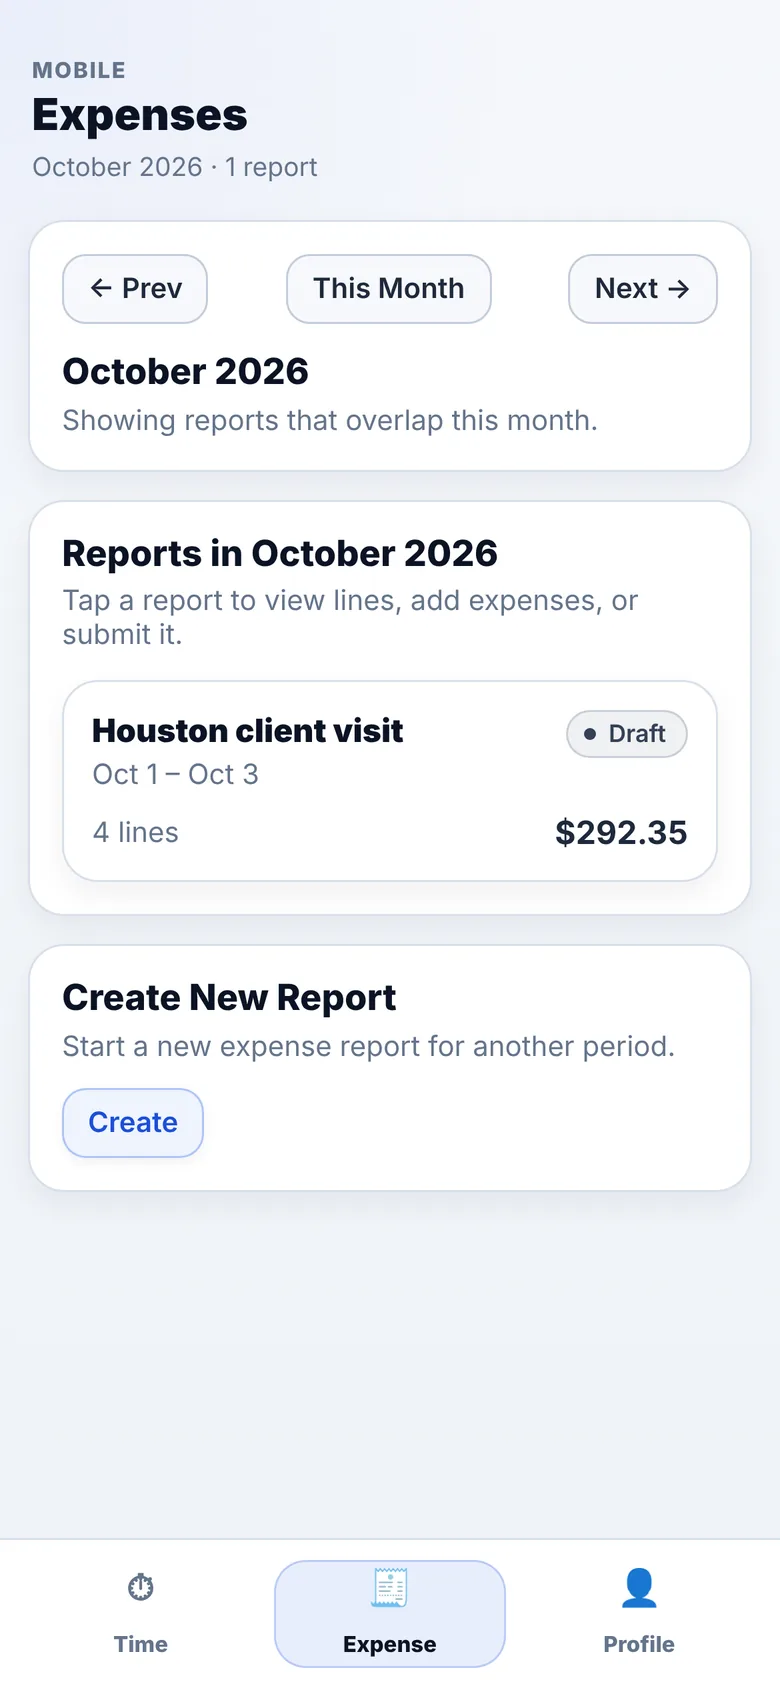
- Time: add entries with Add Entry and submit with Submit Day. Tap an entry to change or delete it.
- Expenses: create a report with Create, then tap it to add expenses. To add a receipt, open a saved expense with Edit and take a photo with Attach Receipt.
- Rejection reasons are shown in red on the entry.
- Submitted expense reports can't be changed on a phone. Use a computer.